Pixel Shaders
You need to have read the introductory page on Shaders and the page on Vertex Shaders before reading this page. A lot of the concepts in shader coding are shared between vertex and pixel shaders so on this page I just discuss the differences along with examples. This page is split into the following sections:
- Introduction
- Pixel Shader Input
- Pixel Shader Output
- Applying the Pixel Shader
- Pixel Shader Example Code
- Summary
Introduction
Pixel shaders allow you to program the part of the graphics pipeline concerned with shading and texturing. The pixel shader receives already multisampled pixels with colour values, z value and texture data. You can also receive values from earlier in the pipeline like normals. In the pixel shader you can write code to carry out texture operations (texture instructions and addressing).
Pixel Shader Input
In a similar way to a vertex shader we can mark variable data as to its purpose using a semantic. The choices for a pixel shader are:
- VFACE - primitive faces
- VPOS - position of pixel (x,y)
- COLORn - colour value
- TEXCOORDn - texture co-ordinate
n is a number and refers to which register the shader will use. TEXCOORDn can be used for other data apart from just texture co-ordinates.
Pixel Shader Output
When we have finished processing the pixel data we can output the values. Again we use semantics to indicate what the values are:
- COLORn - colour for render target n
- DEPTH - a depth value
Applying the Pixel Shader
The pixel shader can be compiled using D3DXCompileShaderFromFile, created using CreatePixelShader and applied for rendering using SetPixelShader. We can also set constants in the shader using SetPixelShaderConstantX. As before I will not describe these methods here as it is easier to use effect files. For full details on effect files see the Effects Files page.
Pixel Shader Example Code
We will start with some very simple examples of per pixel lighting.
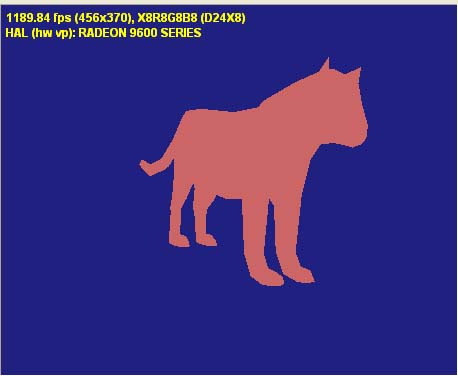
Pixel Shader Example 1 - Ambient Light
Ambient light is the natural light in a scene. It results from the many reflections of light off objects in the scene. It has no direction or position in space so therefore it lights every polygon the same. To code it we take into account the light intensity and the colour of the light. The formula for the ambient light component is therefore:
I = A intensity * A colour
Aintensity is a float value for the intensity of the light and Acolour is a value for the colour components: red, green. blue and alpha.
Our shader will simply output a new colour value so we can create a structure to define the output as:
struct PSOutput
{
float4 colour : COLOR;
};
Our Pixel shader then looks like:
PSOutput PS()
Note that there are a number of ways of returning values from a shader. If we are just outputting a single colour value then instead of using a structure we could just declare our shader like this:
float 4 PS(): COLOR
I will use the structure method in this example and the other in the next example to demonstrate each. So we need to create an instance of our output structure and initialise it's member data to 0:
PSOutput Out=(PSOutput)0;
We are now going to hard code values for the ambient light intensity and colour. The intensity is simply a float value but the colour needs 4 components and so we use a float4:
float Aintensity=0.8f;
float4 Acolour=float4(1.0,0.5,0.5,1.0);
The ambient lighting calculation is then coded and filled into the output structure and returned:
Out.colour=Aintensity*Acolour;
return Out;

So a very simple shader indeed. You can download the effect file for this shader here: PShaderExample1.fx. Load it into the DirectX SDK Effect Edit utility and try changing some values to see what happens.
Pixel Shader Example 2 - Diffuse Light
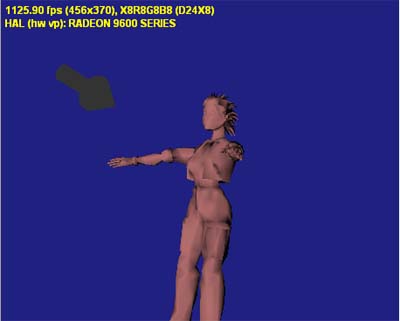
For lights that exist in the scene that have a direction we can use a lighting model originally developed by Lambert in 1760. This lighting model lights a surface independent of the observers position, hence it is commonly used to simulate matte surfaces. The intensity of the light being reflected depends on the angle between the light's direction and the surface direction. E.g. if the light is pointing directly downward and the surface is flat it will be fully lit. However if the light is from the side and the surface is facing the other way it will not be lit.

If L is the light vector and N is the surface normal full diffuse reflection occurs when L and N are aligned: cos(alpha)=1 (the surface is perpendicular to the light beam). The smaller the angle the less the reflection. Therefore light intensity is proportional to cos(alpha).
To implement this we use the following property of the dot product:
N.L = ||N||.||L||*cos(alpha)
If the light and surface normal vectors are normalised (we will make sure they are) we can reduce this to:
N.L=cos(theta)
We can now calculate the diffuse reflection colour in our pixel shader as:
Dintensity * Dcolour * N.L
For this example we are going to write a vertex shader and pixel shader and show how values can be calculated in the vertex shader for use in the pixel shader. You can download the effect file with the shaders here: PShaderExample2.fx. Note that you can click and drag the light direction in the viewer.
Vertex Shader
In our vertex shader as well as transforming the vertex position we also want to take in a light direction and normalise it. In addition we need the vertex normal for our lighting calculations and importantly we need this transformed for use in the pixel shader. The vertex shader to carry out these operations uses an output structure:
struct VS_OUTPUT{
float4 Pos : POSITION;
float3 Light : TEXCOORD0;
float3 Norm : TEXCOORD1;
};
The vertex shader itself:
VS_OUTPUT VS(float4 Pos : POSITION, float3 Normal : NORMAL)
{
VS_OUTPUT Out = (VS_OUTPUT)0;
Out.Pos = mul(Pos, matWorldViewProj); // transform Position
Out.Light = normalize(vecLightDir); // normalised light vector
Out.Norm = -normalize(mul(Normal, matWorld)); // transform Normal and normalize
return Out;
}
Remember that matWorldViewProj is passed in from the application and since we have given it the semantic WORLDVIEWPROJECTION the Effect Edit program will fill the correct values for testing purposes.
Pixel Shader
This shader will output just a colour but will input a light and normal vector from the pipeline. Notice that these use the reusable TEXCOORDn semantic. This time I have not used a structure but show the way of retuning a single value (the colour) from the shader:
float4 PS(float3 Light: TEXCOORD0, float3 Norm : TEXCOORD1) : COLOR
We are going to include ambient light as well as diffuse so the first few lines of this shader declare variables for ambient intensity and colour and diffuse intensity and colour. Of course if you were using this shader in your game you would want to pass these values in from the game.
Next we use the dot function to work out the dot product of the normal and light vectors. The diffuse light is scaled by this amount and then added to the ambient light.
float4 result=Dintensity*Dcolour*(dot(Norm,Light));
// Add the diffuse result to the ambient below for return
return Aintensity*Acolour+result;
Summary
Pixel shaders allow you to write code to handle the shading part of the graphics pipeline. They are useful for per pixel lighting and other more advanced pixel operations. These notes should have given you an introduction to writing pixel shaders but I hope to add some more examples here in the near future.
Further Reading
Wolfgang Engel is one of the leading authors on shaders with DirectX and his book Programming Vertex and Pixel Shaders is highly recommended. More information about this book can be found on the books page.
© 2004-2016 Keith Ditchburn
